Troubleshooting ‘No Signal Dish’: A Comprehensive Guide to Restoring Your Satellite TV
Encountering a ‘no signal dish’ message on your television can be a frustrating experience. It disrupts your entertainment, especially if you’re looking forward to a specific program or event. This comprehensive guide aims to provide you with a structured approach to diagnose and resolve the issue, restoring your satellite TV service promptly. We’ll cover everything from basic checks to more advanced troubleshooting steps, ensuring you have the knowledge to tackle most ‘no signal dish’ scenarios.
Understanding the ‘No Signal Dish’ Error
Before diving into solutions, it’s crucial to understand what a ‘no signal dish’ error signifies. This message indicates that your satellite receiver isn’t receiving a signal from the satellite dish. Several factors can contribute to this, ranging from simple obstructions to hardware malfunctions. Identifying the root cause is the first step toward resolving the problem.
Common Causes of ‘No Signal Dish’
- Obstructions: Physical barriers like trees, buildings, or even heavy snowfall can block the satellite signal.
- Misalignment: Strong winds or accidental bumps can cause the dish to shift slightly, disrupting its alignment with the satellite.
- Cable Issues: Damaged, loose, or corroded cables connecting the dish to the receiver can impede signal transmission.
- Receiver Problems: A malfunctioning satellite receiver may be unable to process the incoming signal.
- LNB Failure: The Low-Noise Block downconverter (LNB), located on the dish, amplifies and converts the satellite signal. Its failure can result in a ‘no signal dish’ error.
- Satellite Outage: Although rare, satellite maintenance or technical issues can temporarily disrupt the signal.
Initial Troubleshooting Steps
Begin with these simple checks to rule out the most common causes of a ‘no signal dish’ error:
Check Cable Connections
Inspect all cable connections between the satellite dish and the receiver. Ensure they are securely fastened and free from corrosion. Pay close attention to the connector at the LNB on the dish itself, as this is exposed to the elements. If you find any loose connections, tighten them. If you notice corrosion, gently clean the connectors with a soft cloth. Replacing damaged or corroded cables is often a necessary step.
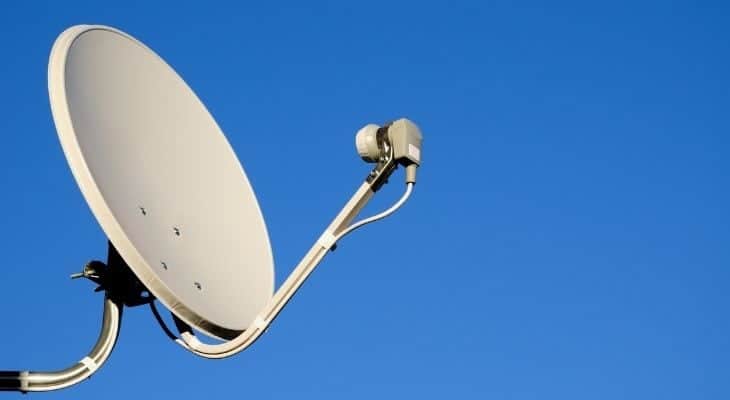
Inspect the Satellite Dish
Visually inspect the satellite dish for any obvious damage or misalignment. Check if the dish is securely mounted and that there are no obstructions blocking its line of sight to the satellite. Even a slight shift in the dish’s position can significantly impact signal reception. Look for branches, leaves, or snow buildup that might be interfering with the signal. Clear any obstructions you find.
Reboot the Receiver
A simple reboot can often resolve minor software glitches that might be causing the ‘no signal dish’ error. Unplug the receiver from the power outlet, wait for about 30 seconds, and then plug it back in. Allow the receiver to power up completely and check if the signal is restored. This process can refresh the receiver’s software and clear any temporary errors.
Check Your Account Status
Ensure your satellite TV account is active and in good standing. Contact your service provider to verify your account status and payment information. A suspended account can result in a ‘no signal dish’ message, even if your equipment is functioning correctly. It’s a quick check that can save you time and effort.
Advanced Troubleshooting Techniques
If the initial steps don’t resolve the ‘no signal dish’ issue, more in-depth troubleshooting may be required:
Signal Strength Meter
Access your receiver’s signal strength meter. This tool provides valuable information about the signal quality being received from the satellite. Consult your receiver’s manual for instructions on how to access the signal strength meter. A low or absent signal reading confirms a problem with the dish, cable, or LNB.
LNB Testing
The LNB (Low-Noise Block downconverter) is a critical component that amplifies and converts the satellite signal. If you suspect the LNB is faulty, you can test it using a multimeter. Disconnect the cable from the LNB and use the multimeter to check for continuity. Consult online resources or a professional technician for specific instructions on testing your LNB model. A failed LNB will need to be replaced.
Dish Realignment
If you suspect the dish is misaligned, you can attempt to realign it. This process requires patience and precision. You’ll need to know the correct azimuth and elevation angles for your location and the specific satellite. Use a satellite finder tool or app to assist you. Make small adjustments to the dish’s position while monitoring the signal strength meter on your receiver. Secure the dish once you achieve the strongest possible signal. If you are uncomfortable with this process, it’s best to call a professional installer.
Cable Testing with a Multimeter
Use a multimeter to check the continuity of the coaxial cable. Disconnect the cable from both the receiver and the dish. Set the multimeter to the continuity setting and touch one probe to the center conductor of the cable and the other probe to the outer shielding. If the multimeter doesn’t show continuity, the cable is likely damaged and needs to be replaced. This test will help you determine if the cable itself is the source of the ‘no signal dish’ problem.
When to Call a Professional
While many ‘no signal dish’ issues can be resolved with DIY troubleshooting, there are situations where professional assistance is necessary:
- Complex Issues: If you’ve exhausted all troubleshooting steps and are still experiencing a ‘no signal dish’ error, a more complex problem may exist.
- Safety Concerns: Working at heights or with electrical equipment can be dangerous. If you’re uncomfortable with any aspect of the troubleshooting process, it’s best to call a professional.
- Equipment Damage: If you suspect significant damage to your satellite dish or receiver, a professional assessment is recommended.
- Lack of Expertise: If you’re not comfortable working with technical equipment or troubleshooting electrical issues, a professional can quickly diagnose and resolve the problem.
Preventing Future ‘No Signal Dish’ Issues
Taking proactive steps can minimize the likelihood of encountering ‘no signal dish’ problems in the future:
- Regular Inspections: Periodically inspect your satellite dish and cable connections for any signs of damage or wear.
- Cable Maintenance: Protect cables from the elements and replace them if you notice any corrosion or damage.
- Tree Trimming: Keep trees and shrubs trimmed to prevent them from blocking the satellite signal.
- Professional Installation: Ensure your satellite dish is professionally installed to guarantee proper alignment and secure mounting.
Conclusion
A ‘no signal dish’ error can be a disruptive inconvenience, but with a systematic approach to troubleshooting, you can often resolve the issue yourself. By following the steps outlined in this guide, you can diagnose the problem, implement the appropriate solutions, and restore your satellite TV service. Remember to prioritize safety and seek professional assistance when needed. Regular maintenance and preventative measures can help minimize the risk of future ‘no signal dish’ occurrences. This guide offers a comprehensive overview of how to address a ‘no signal dish’ problem. By understanding the causes and employing the right troubleshooting techniques, you can regain control of your entertainment experience and avoid the frustration of a lost signal. Remember to always prioritize safety when working with electrical equipment and at heights.
